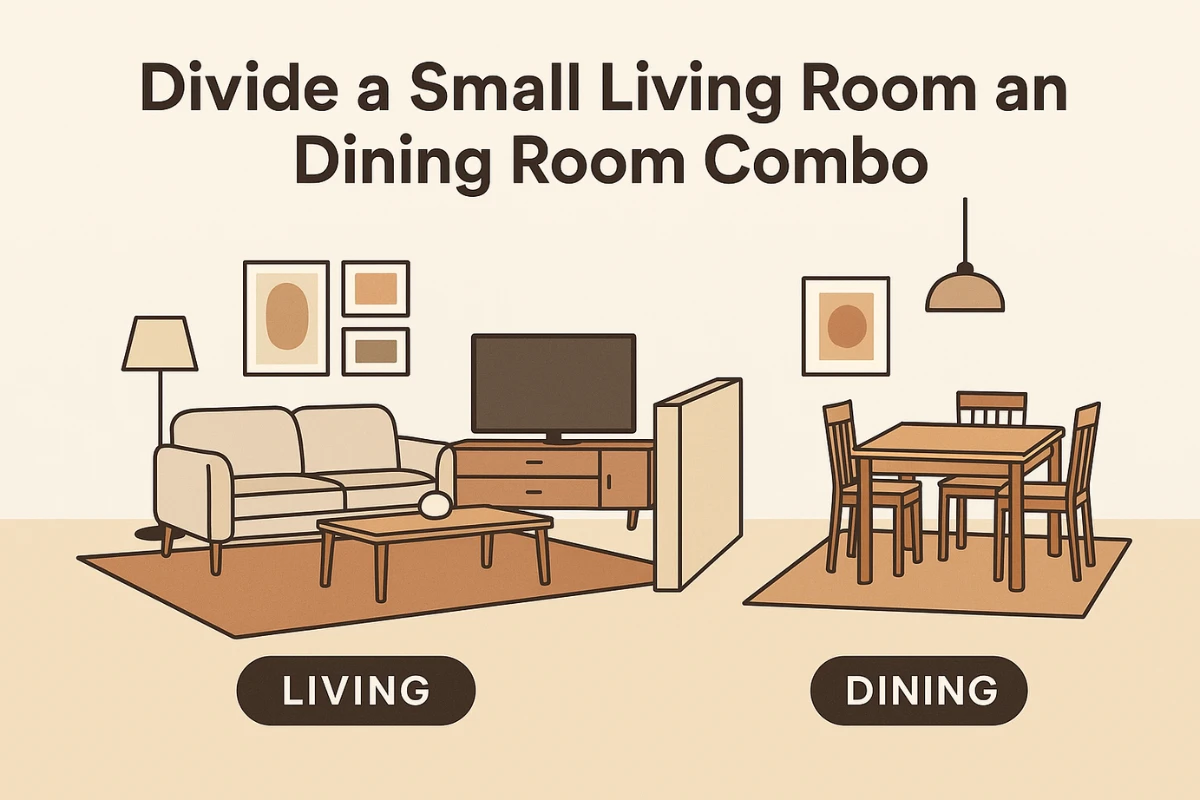
How to Divide a Small Living Room and Dining Room Combo (Without Building Walls)
In small spaces, where the living and dining areas often share a single open floor, creating distinct zones can feel tricky. But with the right layout and a few smart visual tricks, you can define both spaces—without crowding or closing things off.
Contents
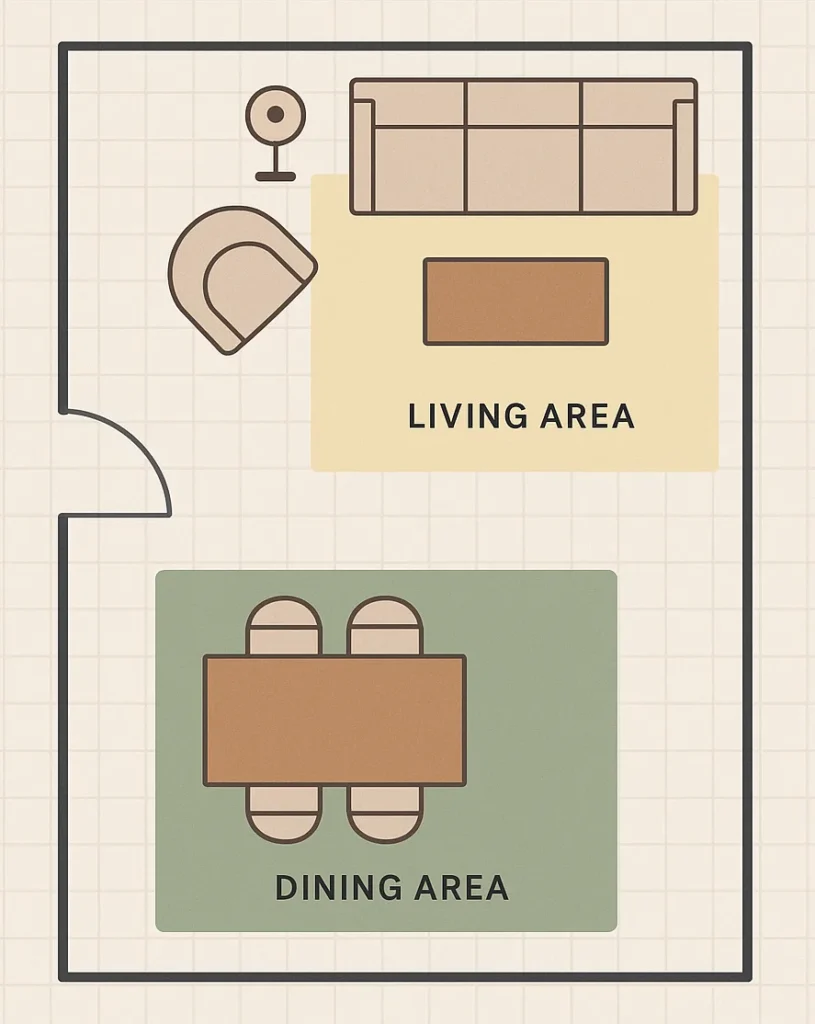
1. Start With a Clear Layout Plan
Before buying furniture or styling anything, start with a layout strategy. In a combined space, every inch matters, so planning is your secret weapon.
Measure the Room First
Grab a tape measure and note the full room dimensions—length, width, and any architectural quirks like windows, doors, or columns. Also factor in walkways. Most designers recommend 30–36 inches of clearance between furniture to allow smooth traffic flow.
Define Functional Zones
Next, think about how you’ll use the space:
- Do you regularly host dinner, or eat mostly on the couch?
- Will your living room double as a workspace or media center?
- Does one area need to be larger than the other?
These answers help determine how much square footage each zone gets. If the dining table is used daily, give it more prominence. If it’s just for the occasional meal, you can tuck it into a corner and give the living area more breathing room.
Sketch a Floor Plan (It Doesn’t Have to Be Fancy)
Draw a quick top-down sketch—use graph paper or a free room planner app. Outline the key furniture (sofa, dining table, TV stand) as basic rectangles.
This helps you:
- Catch awkward overlaps early.
- Confirm that furniture won’t block windows, doors, or traffic paths.
- Experiment with different setups (floating vs. wall-aligned) before moving a single piece.
Anchor the Zones
Now decide where each zone lives. Some common guidelines:
- Living area: Works best near large windows for daylight and a more relaxed vibe.
- Dining area: Logically fits near the kitchen for easier mealtime flow.
Once the zones are set, you can start layering in elements like rugs, lighting, and furniture to define them.
Bottom line: A well-planned layout doesn’t just look better—it works better. And in a small room, that’s everything.
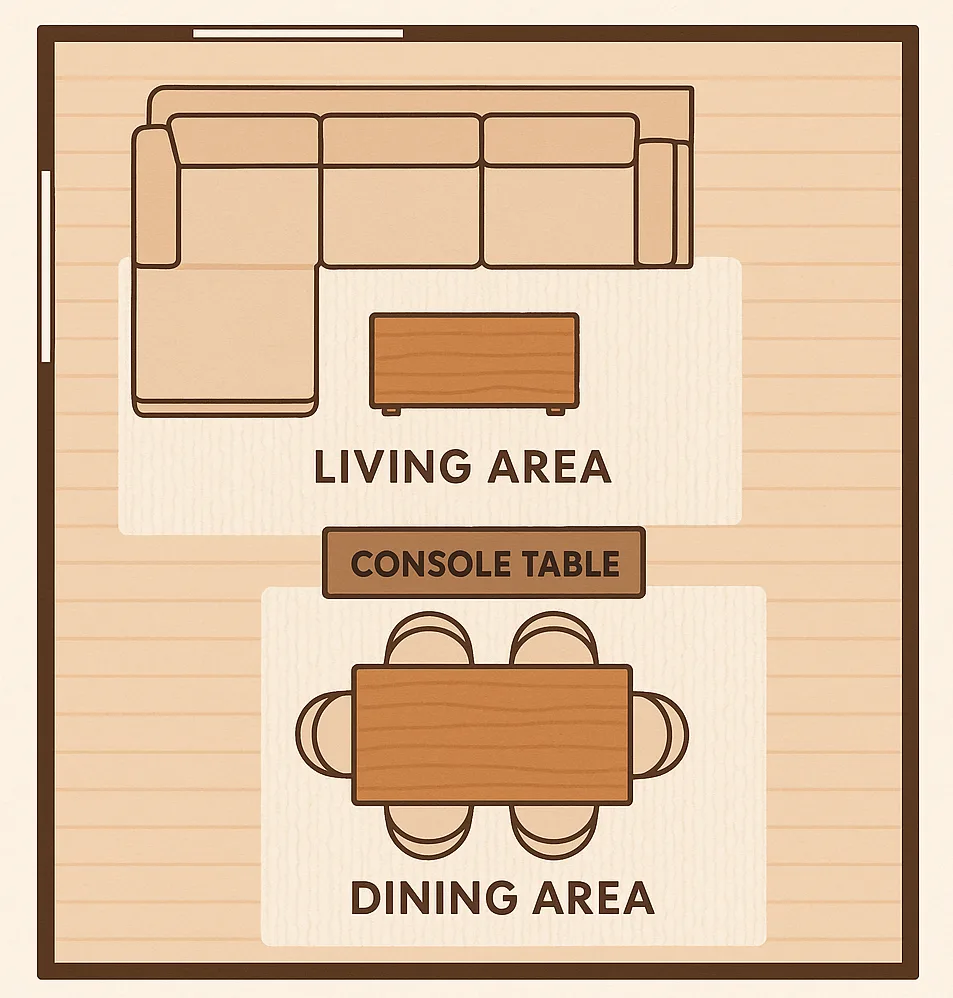
2. Use a Rug to Define Each Zone
Area rugs are one of the easiest ways to divide a room without adding bulk. In open layouts, rugs visually anchor each area and give your furniture a clear home base.
Rug Guidelines for Each Area
Living Area:
- Size: Aim for a rug that fits at least the front legs of the sofa and chairs. If you can fit all four legs, even better—it creates a cozier, more grounded feel.
- Shape: Rectangular rugs usually work best to match seating arrangements.
- Style: Choose a pattern or color that complements your furniture. If your dining rug is bold, keep this one neutral—or vice versa.
Dining Area:
- Size: Make sure the rug extends at least 24 inches beyond all sides of the dining table so chairs stay on the rug even when pulled out.
- Material: Opt for low-pile or flat-weave options that are easy to clean and resist crumbs or spills.
- Shape: Round rugs pair beautifully with round tables and help soften tight corners.
Even though the rugs define different areas, keep them visually connected by using a shared color palette, material, or texture.
3. Let Furniture Act as a Divider
In small living-dining combos, furniture isn’t just about function—it can double as a clever room divider.
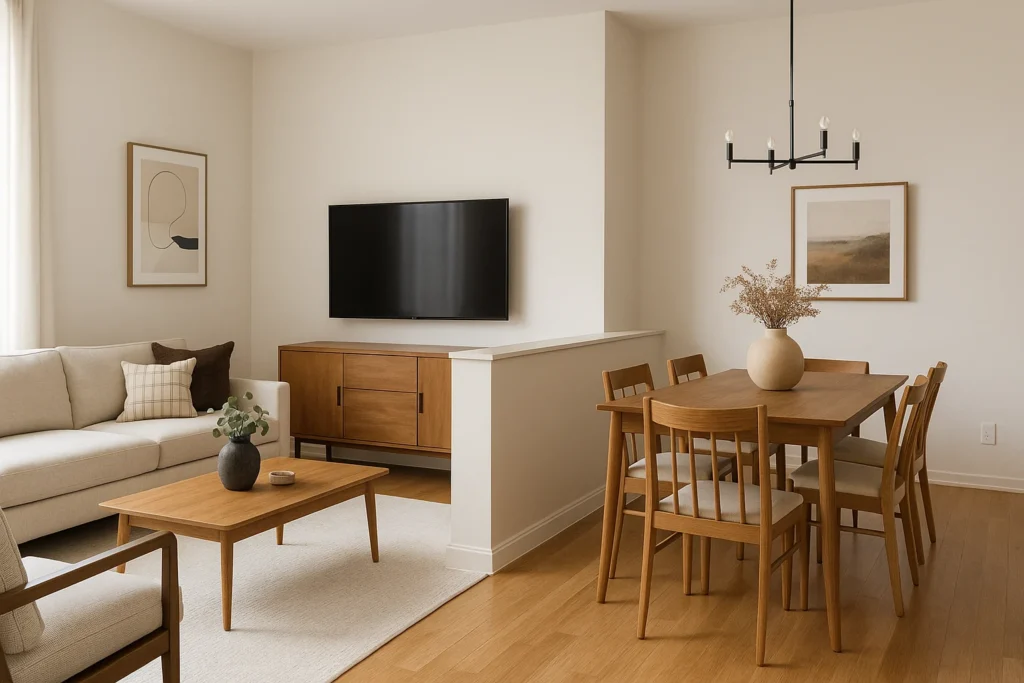
Use Your Sofa as a Soft Barrier
One of the most effective (and renter-friendly) tricks is to float the back of your sofa between the two areas. Instead of pushing it against a wall, let it “face” the living room while its back marks the start of the dining space.
Why it works:
- It creates a natural separation without blocking light or airflow.
- The back of the sofa becomes an invisible line that says “this is the lounge zone.”
Bonus Tip: Add a console table behind the sofa. It visually reinforces the divide and gives you a place for lamps, trays, books, or baskets.
Position Storage Strategically
Low, horizontal storage units like sideboards, credenzas, or storage benches can also serve as dividers—especially between the back of the living area and the start of the dining zone.
- A narrow buffet placed parallel to the dining table defines the eating space and stores tableware.
- A closed cabinet can hide clutter while marking a clean edge between functions.
- A bookshelf with an open back keeps sightlines clear while adding vertical interest and storage.
Try a Rug–Furniture Duo
Pair a zone-defining rug (from Section 2) with furniture that interacts with its edge. For example:
- Let your dining chairs sit fully on their rug while the living room coffee table sits on a different one.
- Float the armchair in a way that slightly overlaps both rugs—it subtly connects the two spaces while still helping define them.
Use Lightweight Furniture for Flexibility
Not every “divider” has to be a big, heavy piece. Sometimes a slim accent chair, rolling bar cart, or even a plant standcan act as a soft boundary that helps shape the room’s flow.
- Use matching height and style to keep everything feeling coherent.
- Avoid anything too tall or bulky—it could block light and make the room feel smaller.
Keep Circulation in Mind
Just because furniture helps divide doesn’t mean it should obstruct movement. Always leave a 30–36 inch pathwaybetween furniture groupings so people can move comfortably between zones.
4. Divide With Light, Not Just Lines
Unlike bulky furniture or room dividers, lighting creates invisible zones using ambiance, contrast, and attention.
Living area lighting is usually softer and more relaxed—perfect for reading, lounging, or watching TV. Dining area lighting should be brighter and more focused to support conversation and meals.
For the Living Area:
- Table lamps and floor lamps create a soft, cozy glow ideal for reading and relaxing.
- Wall sconces are a space-saving option if you’re short on surfaces.
For the Dining Area:
- A pendant or chandelier over the table visually centers the dining zone.
- Dimmers are ideal for adjusting brightness for dinner parties or quiet evenings.
Lighting + Anchors = Defined Spaces
UseLighting works best when layered with other elements—like rugs, furniture, or artwork—to reinforce the zone. For example:
- A pendant above the table + a dining rug + matching chairs = instant dining room.
- A floor lamp + soft rug + coffee table styling = defined living space.
This combination adds clarity and dimension, making the room feel larger and more deliberate.
5. Create a Visual Focal Point in Each Area
Focal points are your visual anchors—they help each area feel intentional, not random.
In the Living Area: Design Around a Focal Feature
Your living space should have a clear “center of gravity”—something that grounds the layout and subtly says, “this is where we relax.”
- Media unit or TV wall: Let it lead the layout. Add shelving, art, or lighting to style it.
- Statement coffee table: Something bold or sculptural creates a centerpiece.
- Gallery wall or large art: A strong vertical element gives purpose and presence to the space.
Tip: Arrange your seating to face the focal point. It reinforces the zone’s identity.
In the Dining Area: Spotlight the Table (Literally)
Even a compact dining nook deserves its moment—and your table should be the star.
- Pendant light: Even in a corner, a centered fixture creates a room-within-a-room effect.
- Art or mirror: Adds dimension and makes the space feel finished.
- Table centerpiece: A simple vase, sculptural bowl, or candle arrangement gives the table a sense of presence.
Bottom line: Clear focal points = clear zones. And in small spaces, clarity is everything.
6. Try a Half Wall or Low Room Divider (Optional for Owners)
If you’re up for a semi-permanent solution (and have permission), a half wall or built-in feature can elevate your space dramatically.
What Is a Half Wall, Exactly?
Also called a pony wall, a half wall is typically around 36–42 inches high—tall enough to separate space, but short enough to maintain sightlines. You can use it in several clever ways:
- Behind the sofa: Acts as a built-in backrest and zone divider.
- Between living and dining areas: Defines both spaces while keeping the open concept intact.
- With a ledge or shelf on top: Adds function for decor, lighting, or even casual seating.
Other Low Divider Ideas
If you don’t want to commit to drywall or permanent changes, you still have options.
- Built-in bench: Doubles as storage and extra seating.
- Open cubby units: Still allow light through while marking the edge of a zone.
- Vertical wood slats: A sleek, modern option that defines without enclosing.
These semi-permanent dividers create a sense of structure without compromising openness.
With intentional layout planning, rugs, lighting, furniture placement, and (if you’re game) low dividers, you can make a small space do big things—stylishly and efficiently.